
Looking for something? Start typing here:
Scot's Blogger is used to created this support system.
This Google Analytics 4 (GA4) module for Miva Merchant takes the hassle out of enhanced ecommerce tracking.
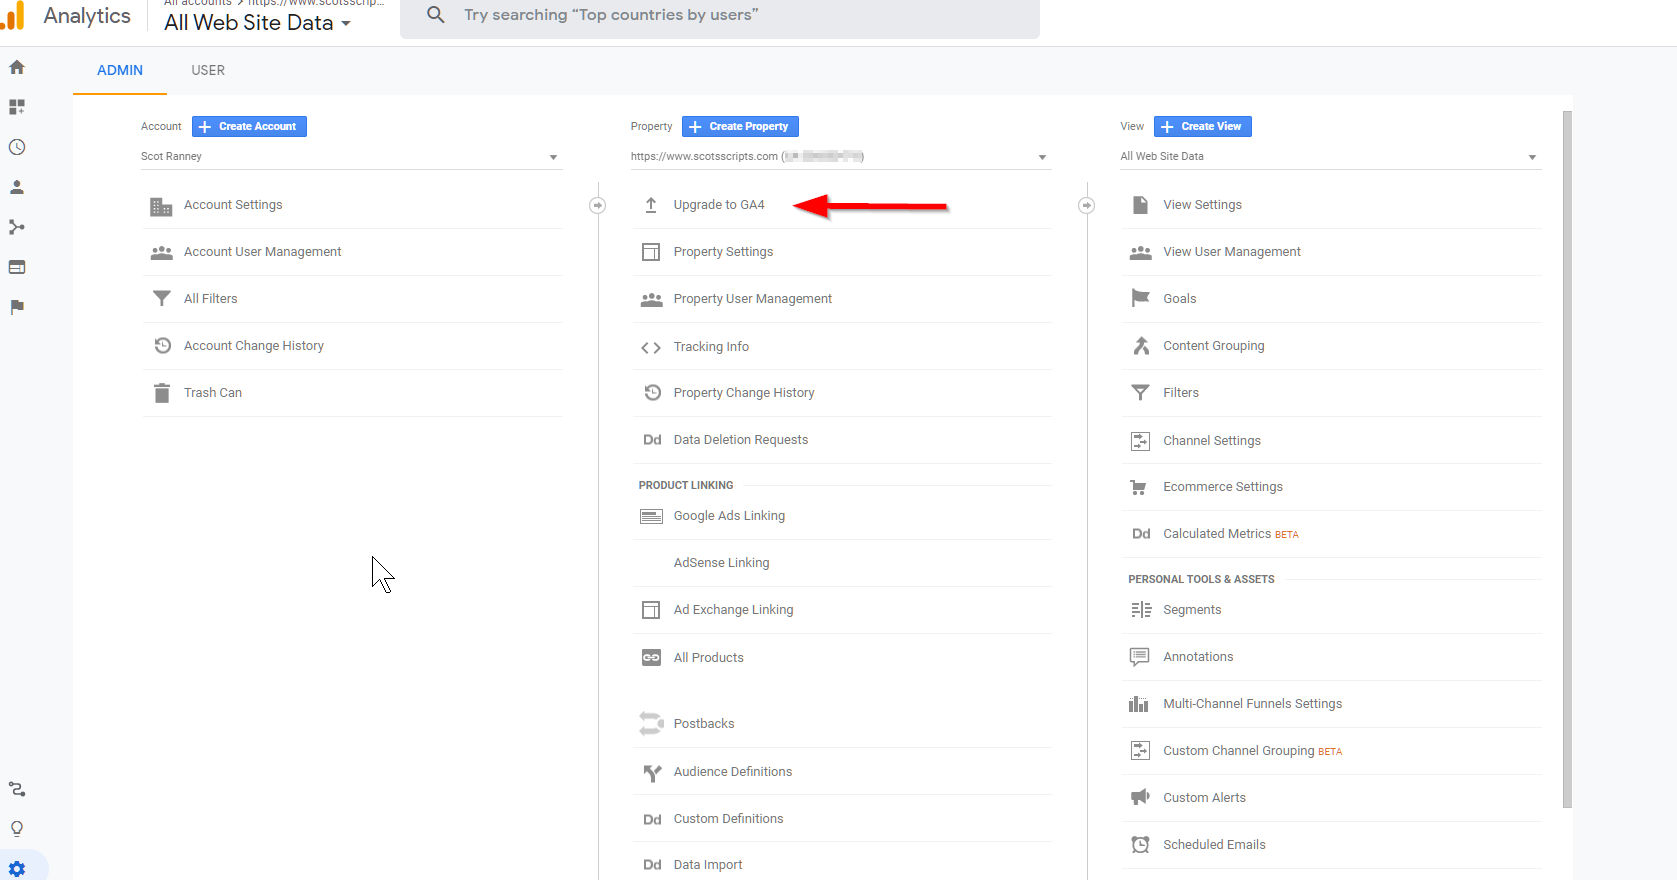
1. Go to ADMIN in the analytics property
2. in the PROPERTY column (middle column) click on UPGRADE TO GA4 if it's available (top option)

3. After you click upgrade you can create a new Google Analytics 4 (GA4) property or connect to an existing GA4 propery by selecting it in the dropdown. It's recommended that you created a new GA4 property.
4. GA4 Credentials: We need two credentials for this to work.
Once you have set up a GA4 property you'll see a column that starts with SETUP ASSISTANT.
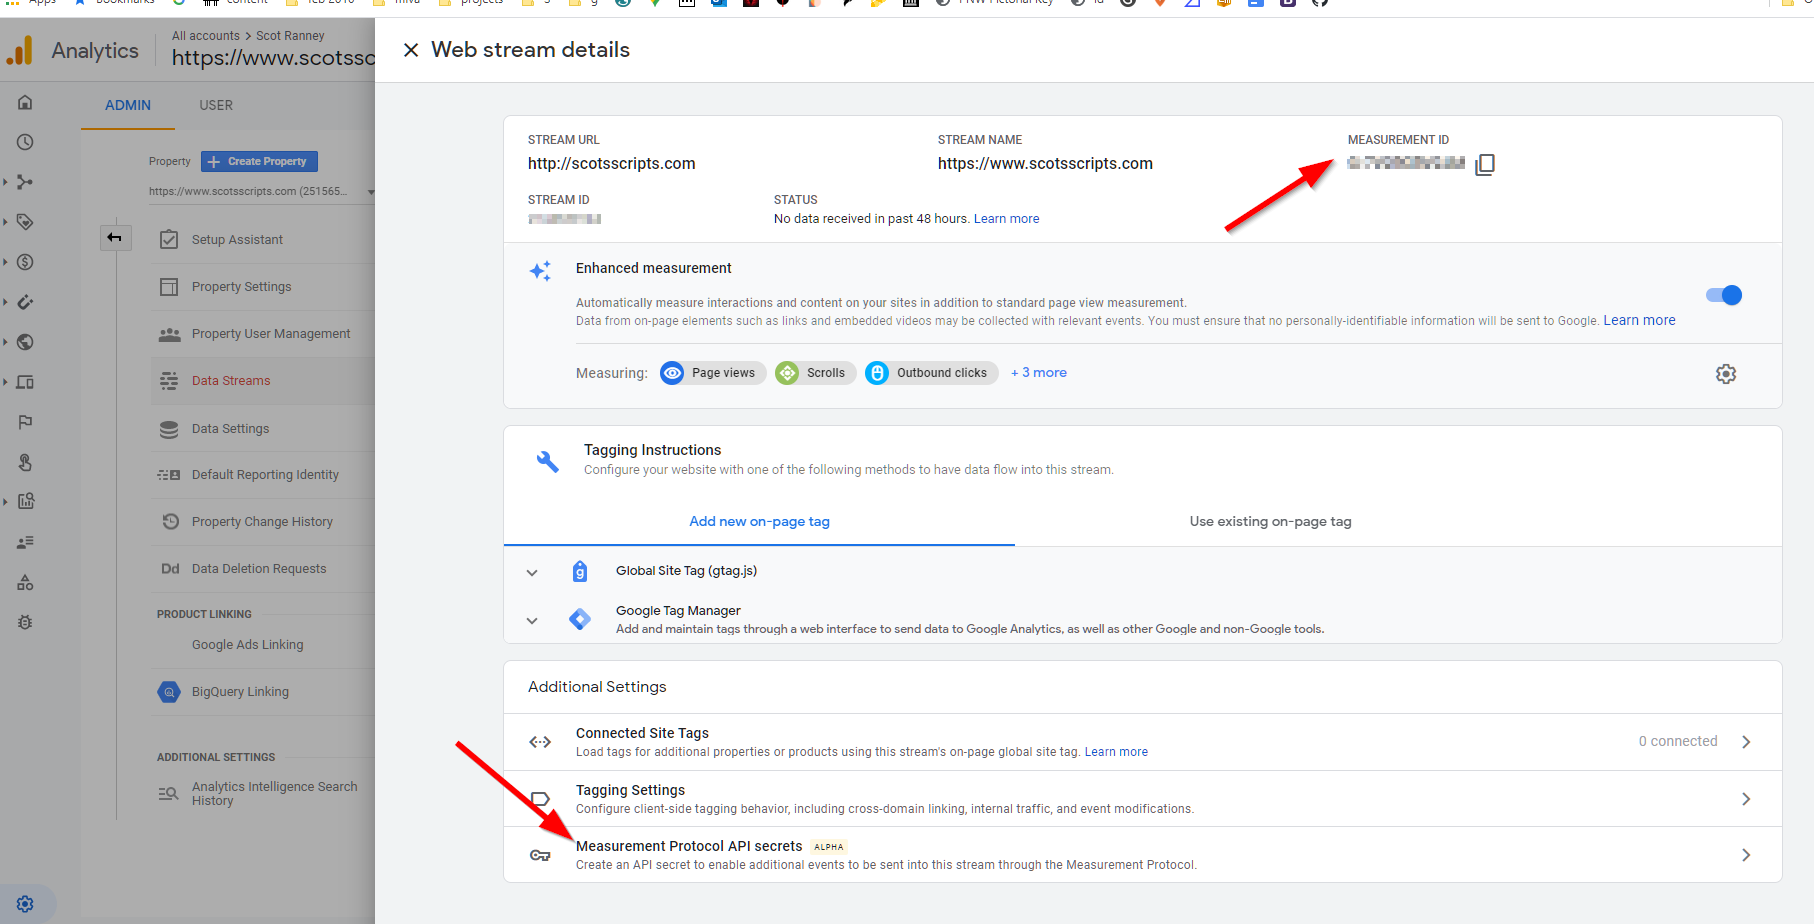
Also in that column is DATA STREAMS. Click on that then click on the gray circled arrow on the right of the data stream so we can get your GA4 credentials.

5. After the Web Stream Details window opens, copy down the Measurement ID and then click on the MEASUREMENT PROTOCOL API SECRETS.

6. If it's your first time, you must click the REVIEW TERMS button and click the ACKNOWLEDGE button on the ensuing popup.

7. In the same MEASUREMENT PROTOCOL API SECRETS window click on the CREATE button to make an API SECRET. Give it a nickname, such as your domain name, and click the CREATE button.
Then make a note of the SCECRET VALUE


8. Finally: Put
<mvt:item name="ganalytics4" />
at the top of the head tag in your GLOBAL HEAD TAG SETTINGS
9. Open up the user interface and go to ITEMS tab and set the pages to be tracked (or alternately assign pages in the module admin.)
10. Go back to ganalytics module admin settings and set the "active" checkbox located top-right of the settings screen.